Saturday, October 31, 2009

Top 7 Artice About Windows 7 You Must Read

    Windows 7 has been released for 1 weeks. And in only 1 weeks after that, a great number of articles about Windows were public.
    This is random list, not sort in any criteria.

Windows 7 Retail Final 32 bit Can Now Download


      Windows 7 officially launches today, but we've been testing, tweaking, customizing, fixing, and writing about this OS for a year now. We present here a guide to everything we've learned about the OS, from first install to final settings change. Whether you've played around with Windows 7 during its beta or release candidate versions, launch day is finally here, and Windows 7 is finally ready for widespread, public consumption. This guide will take you straight through from system requirements and upgrading your PC to highlighting Windows 7's best new features to helping you hit the ground running with all of the awesome tweaks Windows 7 has in store for you.


     With Windows 7 to be released tomorrow, this seemed like a perfect time to take a final look at how its performance compares with that of its much-maligned predecessor, Windows Vista. What we found probably won't surprise you very much, if you've been following the progress of Windows 7 since folks first started getting their hands on it around a year ago: Windows 7 beats Vista—just not always by a huge margin.


     Microsoft is leaving no stone unturned in the promotion of Windows 7 and @MicrosoftHelps could be considered a part of that process. While Microsoft has already embraced Twitter like the other big firms and has many Twitter handles, @MicrosoftHelps was launched recently to provide real time support to Windows 7 users. Microsoft describes it as “the official Twitter account for Microsoft Customer Service.”

     Initially it is meant for Windows 7 users and later on it will be expanded to Microsoft’s other business units. It’s certainly a nice initiative by Microsoft to let its customers have another medium, which might become the fastest way to get their Windows 7 issues resolved.

     These tools will help you make a bootable USB Flash Drive that included Windows 7 installer. So you can setup windows 7 without DVD Drive. What you need?
- Windows 7 ISO file, any version (Ultimate, Professional, Home etc.). You can download those from Internet or create from a Windows 7 DVD Installer with Power ISO, ISO Buster, Nero Burning Rom, Ashampoo Burning Studio etc.
- One of these softwares (click name to download):


     Windows 7 is a big improvement over Vista, and a pretty convenient OS in general—but it's by no means perfect. These 10 downloads improve Windows 7's looks, functions, and make it easier, safer, and more convenient to upgrade to.


     The new version of Windows seems to be a lot for stable than previous releases, however you never know when a malfunction might occur. Today we take a look at an option in Windows 7 that lets you create a System Repair disc in case you need to boot from it to recover your OS.


     Keyboard shortcuts are combinations of two or more keys that, when pressed, can be used to perform a task that would typically require a mouse or other pointing device. Keyboard shortcuts can make it easier to interact with your computer, saving you time and effort as you work with Windows and other programs.
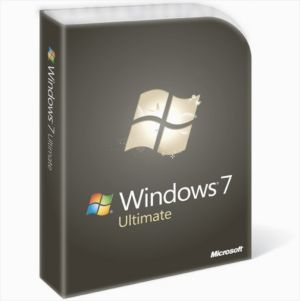
3 Best Tools To Create Bootable USB Flash Drive For Windows 7

    These tools will help you make a bootable USB Flash Drive that included Windows 7 installer. So you can setup windows 7 without DVD Drive. What you need?
   - Windows 7 ISO file, any version (Ultimate, Professional, Home etc.). You can download those from Internet or create from a Windows 7 DVD Installer with Power ISO, ISO Buster, Nero Burning Rom, Ashampoo Burning Studio etc.
    - One of these softwares (click name to download):
    1/ Windows 7 USB/DVD Download Tool: free tool from Microsoft, easy to use, work fine and safe. [More Info]
    To make a copy of your Windows 7 ISO file:

  1. Click the Windows Start button, and click Windows 7 USB/DVD Download tool in the All Programs list to open the Windows 7 USB/DVD Download tool.
  2. In the Source File box, type the name and path of your Windows 7 ISO file, or click Browse and select the file in the Open dialog box.
  3. Select USB to create a copy on a USB flash drive or DVD to create a copy on a DVD disk, then click Next.
  4. If you are copying the file to a USB flash drive, select your USB device in the dropdown list and click Begin copying. If you are copying the file up to a DVD, click Begin burning.


Windows 7 USB/DVD Download Tool

     When your Windows 7 ISO file is copied onto your chosen media, you can install Windows 7 by navigating to the root of your DVD or USB flash drive and double-clicking Setup.exe.

    2/ WinToFlash: not only Windows 7, WinToFlash can creator Bootable USB Flash Drive from any Operating System as Windows 2000, Windows XP, Windows Server 2003/2008 and Windows Vista. And this is not all it can do. WinToFlash can transfer your live CD/DVD to flash card, for example, BartPE. After all you can erase your Flash card and format it with you Windows for every day use. 

    The default options make it easy to roll a silent Windows install, or you can flip the custom switch and specify the exact setup parameters you want to use.


WinToFlash


    3/ A Bootable USB: free tool from AskVG Blog. You can create a bootable USB drive which can be used to install Windows without using DVD drive.


    It also shows a Help window so that you can use the utility easily. The utility requires only 4 easy steps to follow:
  • Check USB drive (To check whether your USB drive is attached or not)
  • Format USB drive
  • Choose DVD or ISO image (To copy the required files to USB drive)
  • Start the process to create bootable USB drive


A Bootable USB

TuneUp Utilities 2010 9.0.2000.16 Final comes with Turbo Mode and Live Optimization

    TuneUp Utilities is one of the best and the famous System Utilites on the World. TuneUp Utilities is ranked #3 in TopTenReviews Product Comparisons [Read more]. But with me, TuneUp Utilities is the best tool for system ever. With hundred of tools for Windows as Optimizer, Cleaner, Repairer, One-Click Optimizer and more. TuneUp Utilities is completely support Windows 7.


TuneUp Utilities 2010 9 Main Interface

Main screen of TuneUp Utilities 2010

Today, TuneUp is released with 2 great new features, this is Turbo Mode and Live Optimization.

Turbo Mode


- Turbo Mode: at main screen, click to ground button at left bottom to Active this function. Turbo Mode works well, and I don't see any problem with it. Effiency:


  • Concentrates the entire performance of the PC on active programs
  • Turns off unnecessary or processes specified by the user
  • Provides a smoother working or gaming experience

    Once you switch on the Turbo Mode from TuneUp Utilities, functions that are used rarely or not at all including planned background maintenance tasks are disabled. This provides concentrated power for the currently active program. Or for more frames per seconds in games.

    If you need specific Windows services such as the Search function or the Sidebar, background programs such as printing or planned Windows maintenance tasks, Turbo Mode can be easily switched off again! If desired, the user can also decide which programs should be switched off to increase performance.
                                                                                                                                                                                                                                                                                                                                                                                                    
                                                           
Configure Live Optimization


- Live Optimization: as default, this function is ON, and automatically optimize entire system. You can see Live Optimization icon at system tray as a Clock and it swings when TuneUp is optimizing.


TuneUp Utilities 2010 9.0.2000.16 Final comes with Turbo Mode and Live Optimization


TuneUp Utilites System tray Icon and Dialog

Configure Live Optimization

  • Manages resources efficiently
  • Improves program response speed
  • Accelerates program startup times


    Live Optimization automatically prevents background programs from reserving too much PC performance for themselves. You will experience a distinctly quicker program startup, greater speed, and more stability on the computer. Programs operate considerably faster and games run with visibly more frames per second.

     Turbo Mode and Live Optimization are a couple features help your system work faster, bester and safier!

    Bedides these, TuneUp One Click Optimizer is improved much more, add Registry Defrag and Optimizer System startup and shutdown. Keep your PC always fast and clean.


TuneUp Utilities 2010 One Click Optimizer

Video Review:

VMWare Workstation 7.0 Released With New Features

VMWare is the best software to create a virtual machine with full function as a real computer. VMWare can simulate a network with virtual card as NAT, bridge etc.
At version 7, VMWare increase hardware graphic support, support Windows 7 better, add more features as Take a Snapshot (custom create a statement of currently machine), Record Execution of Virtual Machine, ACE feature, create a Package etc.


VMWare Workstation 7.0 Released With New Features

More Information from VMWare:

Introducing VMware Workstation 7

Winner of more than 50 industry awards, VMware Workstation transforms the way technical professionals develop, test, demo, and deploy software. Innovative features help software developers, QA engineers, sales professionals, and IT administrators to reduce hardware cost, save time, minimize risk, and streamline tasks that save time and improve productivity.

Ultimate Desktop Virtualization Product for Windows 7

Run Windows 7 in a virtual machine with the industry’s first support for Windows Aero 3D graphics. Easy Install makes installing 32-bit and 64-bit versions of Windows 7 in a virtual machine even easier than on your physical PC. VMware Workstation 7 works with Flip 3D and Aero Peek to show live thumbnails of your virtual machines. Better than Windows XP Mode, you can run Windows XP with 3D graphics, faster performance, and tighter integration with Unity, shared folders and drag and drop convenience. VMware Workstation is optimized for maximum performance when running on 32-bit and 64-bit Windows 7 PCs.


Best 3D Graphics Just Got Better

VMware Workstation was the first to support 3D graphics in virtualized environments and is now the first to support Windows Aero in Windows Vista and Windows 7 virtual machines. Run even more 3D applications with support for DirectX 9.0c Shader Model 3 and OpenGL 2.13D graphics in Windows virtual machines.

Most Advanced Virtualization Platform

Create virtual machines with up to 4 virtual processors or 4 virtual cores and up to 32GB of memory per virtual machine. Driverless printing makes your PC printers automatically accessible to your Windows and Linux virtual machines—no configuration or drivers required. Smart card authentication enables you to dedicate a Smart Card reader to a virtual machines or share access.


Features Professionals Cannot Live Without

• Install and run VMware vSphere 4 and VMware ESXi in a virtual machine
• New IDE integrations for the SpringSource Tools Suite and Eclipse IDE for C/C++
• Replay debugging is now easier and faster
• Remote Replay Debugging makes it easier to share virtual machine recordings for analysis

More Refined Than Ever

Protect from Prying Eyes
Protect your virtual machines from prying eyes with 256-bit AES encryption.
Printing that Just Works
Driver-less printing makes your PC printers automatically accessible to your Windows and Linux VMs—no configuration or drivers required. Your PC’s default printer even shows up as the default, too.
Go Back in Time
Buggy applications, hardware failures, viruses and other malware do not give you fair warning to take a manual snapshot. AutoProtect luckily automatically takes snapshots at set intervals, protecting you from unexpected bumps in the road, making it’s easy to go back in time to when things were good.
Free Up System Resources
Pause a virtual machine to free up CPU resources for use by other running virtual machines or demanding applications.


Take a closer look with Video Review:

Friday, October 30, 2009

List of DoFollow Blogs - Update Regularly

    When you submit one comment to all of them then it gives you more more back links to your Website/Blog. And these back links can help you get you a better PageRank.
Or You can see list of DoFollow forums (High Pagerank and High Quaility)
   
Ablog
DaveDragon
DotSauce
FatManUnleashed
GospelRhys
Invesp
OnARidge
FatLadySingz
PixelHeadOnline
DarkSEOProgramming
SparkInternetMarketing
Revellian
DayJobNuker
Logon
JakobDK
Allscm
TriathlonTraining
YourWebsiteProfit
HowToWakeUpEarly
LondonerLife
VandelayDesign
LaughOutLoudDogs
RonaldoCamacho
BillHartzer
FootbagShop
NeoMeme
Marenda
SavingMoney
WomanStartYourBusinessNow
SunlightFlavor
TheBuffaloRiver.com
LifeSnippets.net
JoeBartender
OneMansGoal
MeloVillaReal
Web360
Jakeldaily
TallFreak
BaseballInvestor
TheDarkLightOfLove
LifeInTheRough
Sandossu
TheDailyFuzz
ErikKarey
BothMadAndGenius
ThreeSticks
RobertaFerguson
MarketingASolicitor
FruityOaty
PilotJohn
Mrgtp
RobNeville
NetMonetization
Salatti
LakeTrees
BowerBirdBeads
BloggersJourney
LosingProposition
EndangeredSpaces
SecretsOfUnlimitedProsperity
Amorphism
Health-HundredDayHeadstart
Jenny’sCorner
TheBrokenBow
TheDietDiary
Wealth Health Blog
JadeHat
Nice4Rice
Hem
News Notion
RealityWired.com
BrilliantCheers
Achille
OnTheWebEd
JonLee
ChrisHoyt
JulieAnnBonner
LinkItForMe
RamblingThoughtsBlog
BlogThatOutside
Tobsy
NOWG
CatchAFallingStar
SweetAgring
LayerCake
ErikSvend
PajamaProfessional
MyOpinionsAreImportant
RoadLessTravelled
Foximus
BetShopBoy
5xMom
Derek Semmler
Linguistics Zone
Zr5
SmartWealthyRich
How To Split An Atom
The Alternative Self-Employment Blog
A Politically Incorrect Entrepreneur
CrayonWriter
BlogRaters
TagsKitchen
TradeMacro
Mother’s Home
Brian Pratt
Best Real Income
3DayMom
A Writers Words, An Editors Eye
Aaron Roselo
Advertising for Success
And to Think
Andy Beard
Ang’s Chicken Coop
Are we there yet
Army Mom:New Jersey
Article Writer, The
Ask Jason
Ask Jason Business
Axplay
BenSpark, The
BenSpark 2: Electric Boogaloo
BiggerPockets
BlogAboutMoneyOnline
BloggingTips
Blogocola
Blogozine
BMonaco
BodyFitnessInfo
BrownSista BuyMeBlog
Buzz Queen, The
By the Sea

Cade’s WriteToRight
CampingCoop.org
Life is Colourful
Candid Quips
Charmed and Dangerous
Colloquium
Comedy Plus
Community Building Blog
Curious Cat Science
Confessions of a Housewife
Confessions of an Everyday housewife
CoolAdzine for Marketers
Craftblog
Crafts 4 Dummies
David Dairey
Dont Fear the Truth
DorisGoShopping.com
Down Memory Lanes
Ecomm Tips
EMoneyMarketing
Endangered Spaces
Fibromyalgia Experiment, The
Finding Life\’s Enchantments
Flatwater Tech
Fools Wisdom
FootPrints On the Moon
Fuzzy Future
Jonlee
Jones PC
JOIN - Do Follow Bloggers **
Julies Journal
Just Not Martha
Kansha Shite
Knitting Fiend, The
Last Blogger
LeaveAmerica
Life in the Fast Lane
Life Is Risky
Life Learning Today
Life Of A School Bus Driver, TheLife Passion Travel & More
Life through eyes of Krissy
Lifecruiser
LittleAmerica.us
Live Life Organics & Your Health
Magical Rose Garden
Marketing Blagger
Master Cleanse
Midlife Musings
Mom is Nutz
MomReviews.net
Mothering Many
My Credit Group
My Dandelion Patch
My Home Recipe
My Muddled Mind
My Opinion Counts
My Thoughts, Ideas, and Ramblings
Nanashi-Inc.net
New Century Politics
No Average Mom
Odd Planet
On the Horizon
Open Road Biker
Patrick Says v2.0
Paula Mooney
PBriscoe.com
Pegs AZ Life
Pencil Thin
PimpMyPageRank
Pink Poison Store
Pond, The
Ramblings Of An Undisturbed Mind
Randa Clay Design
Raw Vegan Momma
Reasoner, The
Rotten Bananas
Sassy Southerner, TheScribble On The Wall
Scuttlebutt Pipeline
Selena’s Travel and Culture
SelfHynosisProgram
Shopping Flavor
ShowMeHealthBiz
ShowMeMoneyBiz.com
Simple Kind Of Life
Simplify Every Obstacle
Skeets Stuff
Sophistishe.Org | Personal Blog
SQKIKs Simple Tech
Super Blogging
Sun-Flower Family, The
Table for Five
TeaScoop
TechieZone
Teenage Angst Regression
Texas RV Travel blog
Thermal
TimeForBlogging
Tricia\’s Musings
Utterly Geek
Wanders World
Web Files, The
WebStyle
Whatever I Feel Like
Wild & Crazy Ride
Winding Threads
Wired Kayaker, The
Women Mumbles
Work At Home Mom Revolution
Yoga Blog


http://www.themallblog.com/ - PR6
http://www.midasoracle.org/ - PR6
http://randaclay.com/ - PR6
http://www.seotops.com/ - PR5
http://www.knrn.org/ - PR5
http://larholm.com/ - PR5
http://djallyn.org/ - PR5
http://www.barrywise.com/ - PR5
http://www.oilman.ca/ - PR5
http://successcreeations.com/ - PR4
http://psdvibe.com/ - PR4


List of DoFollow Blogs - Update Regularly

UPDATE 30 OCT 2009
http://kikolani.com/ - PR4
http://www.memwg.com/ - PR4
http://www.marketing-results.com.au/blog/ - PR4
http://nthambazale.com/ - PR4
http://raven-seo-tools.com/blog/ - PR4
http://www.seopittfall.com/ - PR4
http://www.searchenginepeople.com/blog - PR4
http://blog.shoplet.com/ - PR4
http://middlezonemusings.com/ - PR4
http://heiseidemocracy.com/ - PR4
http://www.wordpressmax.com/ - PR4
http://www.techjaws.com/ - PR4
http://www.scrapscene.com/ - PR4

Thursday, October 29, 2009

Increase efficiency in the Affiliate Marketing program

  • 1.Before is your website.
    - Program CPA will easily be customers that allows you to participate, however, CPC and CPM, it will be very difficult to accept. The first thing you need to do that is to upgrade your website on the interface, content and information in the matter, it should define clearly the audience will regularly visit your site to determine which types of goods and / or service in accordance with your site most.
    - Arrange positions on your site, clearly identifying the type size will match, or it should re-design in which the position to suspend any banner, the position to post. All position to advertise so arranged according to 12 standard size of the international or the size of the standard Network Affiliate you are participating. Do not do bad because your web size is not standard.
    - Do not create pages specifically for ads, or to create 1 page "to clicking on the forum" but practically the whole page that contains advertising, so soon what will later be denied Adv program, you will lose the right to benefit of long-term.

  • 2. Adv choose, choose banner, choose the location.
    - You can register for all programs of Adv, but either not accepted, or 1 in the time it was stopped ... The reason is Adv do not see effective from you through the clicking mouse. So if Adv chosen as partners, you need to "care for" them so they are always thinking about you in any advertising program, or the Affiliate Network will see the effect of the ban, which they recommend to customers of them.
    - When has joined the program, select the banner and suspended the position is very important. According to experience Affiliate Marketer of the world: Flash Banner had been a doubt the best choice, sometimes even the simple banner to create more effective than many. Along with that is a banner hanging position, good location will attract more clicking and of course you should put any customers pay the highest position for the most beautiful, you can collect a lot of clicking one.
    - Perspective color banner with your web or placed near the message is also a hot tips to help visitors pay attention to the banner over. Sometimes you can write PR items, such as on food Ha Noi (if you're advertising for a Adv about restaurants in Ha Noi), brought up and put hot topic right next to the banner ... Also you can to some bold headlines, can also increase the share attention to the surf.
    - Stop HOME forget your care for it. Home is the most important pages on your website and also direct hits most. Ads placed in the home will create very big Impression turns, but will not be clicking many, if not well coordinated measures Marketing above.
    - You too many hanging banner of 1 customers will also reduce the value of your web, can sometimes cause side feeling (because of Impression increased many times). You also admit position, then suspended 1 image or 1 is the animation, on the web Adv'll see you also have cost me, you no longer take the position and course of clicking real substance is only approximately banner hanging 1-2 .


Increase efficiency in the Affiliate Marketing program


  • 3. Member of the web to understand you are one.
   - Contextual Ad: access to web you will be clicking through the ad's content, so the solution banner, the position is very important, the items sometimes PR will increase efficiency.
   - Ad Behavior: you need to know object to the web who you are, usually pay attention to what (through your post, web content to your evaluation), if traffic is increasing thanks to you What used to measure "the guests"??? Since then Ad know what will be the best. Ad Behavior is the art that the super Blogger used to earn up to hundreds of thousands $ $ $ per year (ac, so much so).

  • 4.Can must be honest to create effective long-term.
    - This is a key factor when playing Affiliate be respected. Whether you have many visitors, though the content good, but if there is any fraud, there shall be immediately stopped Adv will cooperate with you. The ratio "Click Through Rate" generally only about 0025%, up to 0.1% is horrors, so if you increase the money too much (at the first time can be accepted) in the position you hanging " not very nice ", the course will doubt arose, they can stop playing with you and you also not complained because the Adv who is paying you.
   - All forms of Ho Hao, thanks to friends, Member clicking households will also generate volume CTR higher than reality, and of course will also vulnerable to determine more. So tip is always determine the CTR to understand the effectiveness of the program, if necessary can island ad placements to evaluate more effectively, from which arranged the best advertising.

Disable Firefox Extension Compatibility Check to use Old Add-ons

     Most of old Add-ons don't work on new Firefox such as Firefox 3.6, Firefox 3.7, 4.0, even Firefox 3.5. Although you can edit add-ons files (*.xpi) to make it support newer Firefox version, but this way is complicated and waste time.
     And the best way is directly disable compatibility check of Firefox. With this way, you can install any add-ons to any Firefox version without warning about version support, fast and easily. But note that, you can install not mean you can use it normally, maybe get some error or even add-on can't run (rarely). I've used this way since Firefox 3.0 beta and everything are alright.                                                                                                                                       
Now, let's do it. Follow these steps:

     1/ Open Firefox, type about:config at address bar and Enter. Press I'll be careful, I promise! to continue.


Firefox about config

     2/ Now, you will see Firefox config page, right click on blank area and choose New > Boolean, at New Boolean Value dialog, type this name: extensions.checkCompatibility and then OK.


Firefox add new boolean

     3/ In next dialog, you must choose False. If you choose True, Extenstion Compatibility is still working. Last, restart you Firefox and start install any add-ons you want.


Firefox addons compatibility check disabled

NOTE:
     - This tip works fine on all version of Firefox 3.x and include Firefox 4.x.
     - After did this step, when open Add-ons Manager, you will see yellow bar talks that Add-on Compatibility is disable. You can click Enable button to enable it (should not). Furthermore, you can see a warning icon at some add-ons icon with note "... not compatible with Firefox...". Just ignore it.

Video Tutorials:

Wednesday, October 28, 2009

Mozilla release Firefox 3.5.4 Final, 3.6 pre-beta 2 and Firefox 3.7 Alpha 2 on 27 Oct 2009

     With me, Firefox is the best browser ever. A open source browser with a lot of great features. Firefox is updated regularly and always fix all bug with a short time.
     Yesterday, 27 Oct 2009, Mozilla released 3 new version of Firefox, there are 3.5.4 Final, 3.6 pre-beta 2 and Firefox 3.7. With Firefox 3.5.4, you can easily see and download from Mozilla. But others verson have been released silently. And when visit Firefox storage of Mozilla in address:         http://ftp.mozilla.org/pub/mozilla.org/firefox, I saw these new version.
                 
      Firefox 3.5.4 Change log:

What's new in Firefox 3.5.4 Final:

· Crashes with evidence of memory corruption (rv:1.9.1.4/ 1.9.0.15)
· Upgrade media libraries to fix memory safety bugs
· Download filename spoofing with RTL override
· Cross-origin data theft through document.getSelection()
· Heap buffer overflow in string to number conversion
· Chrome privilege escalation in XPCVariant::VariantDataToJS()
· Heap buffer overflow in GIF color map parser
· Crash in proxy auto-configuration regexp parsing
· Crash with recursive web-worker calls
· Local downloaded file tampering
· Form history vulnerable to stealing


Firefox 3.7 Alpha


  • Download links for Windows Version, English language:
Firefox 3.5.4 Final | Firefox 3.6 pre-beta 2 | Firefox 3.7 Alpha (Zip, no need install)

//Updated 29 Oct 2009: Firefox 3.7 Alpha now is Alpha 2

Monday, October 26, 2009

11 Windows 7 Keyboard Shortcut (Hotkeys) Most Used

Windows 7 come up with a lot of new hotkeys that will help you improve working rate. Although in Windows 7, mouse is still essential, with lots of new feature which takes advantage of mouse gesture, such as Aero Snap, Aero Peek, Aero Shake and etc.However, some users still prefer to use keyboard to use the Windows operating system.                                           


All Windows 7 Keyboard Shortcuts List

You can see all hotkeys of Windows 7 here: All Windows 7 Keyboard Shortcuts (HotKeys) List
Here’s some hotkeys I made up for some of the handy new hotkey combinations, many of which I’ve become quite dependent on!

  1. Windows + Home: minimize all windows, exclude active windows.
  2. Windows + 0, 1, 2,... or 9: Start the program pinned to the taskbar in the position indicated by the number. If the program is already running, switch to that program.
  3. Windows + Alt + 0, 1, 2... 9: open jump list of the program pinned to the taskbar.
  4. Windows + Shift + 0, 1, 2... 9: open a new windows of the programm pinned to the taskbar.
  5. Windows + Tab: see the desktop, all windows become transparency.
  6. Windows + Up/Down: Maximize/Restore or Minimize Windows
  7. Windows + Left/Right: move active Windows to left/right of screen.
  8. Windows + T: focus the fist taskbar entry, press again will move around all taskbar. 
  9. Windows + Shift + Left/Right: Jump to Left/Right monitor.
  10. Windows + G: Bring gadgets to the top of the Z-order
  11. Alt + P: Show/Hide preview pane

All Windows 7 Keyboard Shortcuts (HotKeys) Complete List

From Microsoft: Windows 7 Keyboard Shortcuts here


Keyboard shortcuts are combinations of two or more keys that, when pressed, can be used to perform a task that would typically require a mouse or other pointing device. Keyboard shortcuts can make it easier to interact with your computer, saving you time and effort as you work with Windows and other programs.
Most programs also provide accelerator keys that can make it easier to work with menus and other commands. Check the menus of programs for accelerator keys. If a letter is underlined in a menu, that usually means that pressing the Alt key in combination with the underlined key will have the same effect as clicking that menu item.
Pressing the Alt key in some programs, such as Paint and WordPad, shows commands that are labeled with additional keys that you can press to use them.


All Windows 7 Keyboard Shortcuts List

If you can't remember all hotkeys, just read and note 11 Windows 7 Keyboard Shortcut (Hotkeys) Most Used.

All Keys are divided in 13 groups, sort by Alphabet:


Ease of Access keyboard shortcuts
  • Right Shift for eight seconds: Turn Filter Keys on and off
  • Left Alt + Left Shift + PrtScn (or PrtScn): Turn High Contrast on or off
  • Left Alt + Left Shift + Num Lock: Turn Mouse Keys on or off
  • Shift five times: Turn Sticky Keys on or off
  • Num Lock for five seconds: Turn Toggle Keys on or off
  • Windows logo key + U: Open the Ease of Access Center
General keyboard shortcuts
  • F1: Display Help
  • Ctrl + C (or Ctrl + Insert): Copy the selected item
  • Ctrl + X: Cut the selected item
  • Ctrl + V (or Shift + Insert): Paste the selected item
  • Ctrl + Z: Undo an action
  • Ctrl + Y: Redo an action
  • Delete (or Ctrl + D): Delete the selected item and move it to the Recycle Bin
  • Shift + Delete: Delete the selected item without moving it to the Recycle Bin first
  • F2: Rename the selected item
  • Ctrl + Right Arrow: Move the cursor to the beginning of the next word
  • Ctrl + Left Arrow: Move the cursor to the beginning of the previous word
  • Ctrl + Down Arrow: Move the cursor to the beginning of the next paragraph
  • Ctrl + Up Arrow: Move the cursor to the beginning of the previous paragraph
  • Ctrl + Shift with an arrow key: Select a block of text
  • Shift + any arrow key: Select more than one item in a window or on the desktop, or select text within a document
  • Ctrl + any arrow key + Spacebar: Select multiple individual items in a window or on the desktop
  • Ctrl + A: Select all items in a document or window
  • F3: Search for a file or folder
  • Alt + Enter: Display properties for the selected item
  • Alt + F4: Close the active item, or exit the active program
  • Alt + Spacebar: Open the shortcut menu for the active window
  • Ctrl + F4: Close the active document (in programs that allow you to have multiple documents open simultaneously)
  • Alt + Tab: Switch between open items
  • Ctrl + Alt + Tab: Use the arrow keys to switch between open items
  • Ctrl + Mouse scroll wheel: Change the size of icons on the desktop
  • Windows logo key + Tab: Cycle through programs on the taskbar by using Aero Flip 3-D
  • Ctrl+ Windows logo key + Tab: Use the arrow keys to cycle through programs on the taskbar by using Aero Flip 3-D
  • Alt + Esc: Cycle through items in the order in which they were opened
  • F6: Cycle through screen elements in a window or on the desktop
  • F4: Display the address bar list in Windows Explorer
  • Shift + F10: Display the shortcut menu for the selected item
  • Ctrl + Esc: Open the Start menu
  • Alt + underlined letter: Display the corresponding menu
  • Alt + underlined letter: Perform the menu command (or other underlined command)
  • F10: Activate the menu bar in the active program
  • Right Arrow: Open the next menu to the right, or open a submenu
  • Left Arrow: Open the next menu to the left, or close a submenu
  • F5 (or Ctrl + R): Refresh the active window
  • Alt + Up Arrow: View the folder one level up in Windows Explorer
  • Esc: Cancel the current task
  • Ctrl + Shift + Esc: Open Task Manager
  • Shift when you insert a CD: Prevent the CD from automatically playing
  • Left Alt + Shift: Switch the input language when multiple input languages are enabled
  • Ctrl + ShiftL: Switch the keyboard layout when multiple keyboard layouts are enabled
  • Right or Left Ctrl + Shift: Change the reading direction of text in right-to-left reading languages
Dialog box keyboard shortcuts
  • Ctrl + Tab: Move forward through tabs
  • Ctrl + Shift + Tab: Move back through tabs
  • Tab: Move forward through options
  • Shift + Tab: Move back through options
  • Alt + underlined letter: Perform the command (or select the option) that goes with that letter
  • Enter: Replaces clicking the mouse for many selected commands
  • Spacebar: Select or clear the check box if the active option is a check box
  • Arrow keys: Select a button if the active option is a group of option buttons
  • F1: Display Help
  • F4: Display the items in the active list
  • Backspace: Open a folder one level up if a folder is selected in the Save As or Open dialog box
Windows logo key keyboard shortcuts
  • Windows logo key: Open or close the Start menu.
  • Windows logo key + Pause: Display the System Properties dialog box.
  • Windows logo key + D: Display the desktop.
  • Windows logo key + M: Minimize all windows.
  • Windows logo key + Shift + M: Restore minimized windows to the desktop.
  • Windows logo key + E: Open Computer.
  • Windows logo key + F: Search for a file or folder.
  • Ctrl + Windows logo key + F: Search for computers (if you’re on a network).
  • Windows logo key + L: Lock your computer or switch users.
  • Windows logo key + R: Open the Run dialog box.
  • Windows logo key + T: Cycle through programs on the taskbar.
  • Windows logo key + number: Start the program pinned to the taskbar in the position indicated by the number. If the program is already running, switch to that program.
  • Shift + Windows logo key + number: Start a new instance of the program pinned to the taskbar in the position indicated by the number.
  • Ctrl + Windows logo key + number: Switch to the last active window of the program pinned to the taskbar in the position indicated by the number.
  • Alt + Windows logo key + number: Open the Jump List for the program pinned to the taskbar in the position indicated by the number.
  • Windows logo key + Tab: Cycle through programs on the taskbar by using Aero Flip 3-D.
  • Ctrl+Windows logo key + Tab: Use the arrow keys to cycle through programs on the taskbar by using Aero Flip 3-D.
  • Ctrl+Windows logo key + B: Switch to the program that displayed a message in the notification area.
  • Windows logo key + Spacebar: Preview the desktop.
  • Windows logo key + Up Arrow: Maximize the window.
  • Windows logo key + Left Arrow: Maximize the window to the left side of the screen.
  • Windows logo key + Right Arrow: Maximize the window to the right side of the screen.
  • Windows logo key + Down Arrow: Minimize the window.
  • Windows logo key + Home: Minimize all but the active window.
  • Windows logo key + Shift + Up Arrow: Stretch the window to the top and bottom of the screen.
  • Windows logo key + Shift+ Left Arrow or Right Arrow: Move a window from one monitor to another.
  • Windows logo key + P: Choose a presentation display mode.
  • Windows logo key + G: Cycle through gadgets.
  • Windows logo key + U: Open Ease of Access Center.
  • Windows logo key + X: Open Windows Mobility Center.
Windows Explorer keyboard shortcuts
  • Ctrl + N: Open a new window
  • Ctrl + W: Close the current window
  • Ctrl + Shift + N: Create a new folder
  • End: Display the bottom of the active window
  • Home: Display the top of the active window
  • F11: Maximize or minimize the active window
  • Ctrl + Period (.): Rotate a picture clockwise
  • Ctrl + Comma (,): Rotate a picture counter-clockwise
  • Num Lock + Asterisk (*) on numeric keypad: Display all subfolders under the selected folder
  • Num Lock + Plus Sign (+) on numeric keypad: Display the contents of the selected folder
  • Num Lock + Minus Sign (-) on numeric keypad: Collapse the selected folder
  • Left Arrow: Collapse the current selection (if it’s expanded), or select the parent folder
  • Alt + Enter: Open the Properties dialog box for the selected item
  • Alt + P: Display the preview pane
  • Alt + Left Arrow: View the previous folder
  • Backspace: View the previous folder
  • Right Arrow: Display the current selection (if it’s collapsed), or select the first subfolder
  • Alt + Right Arrow: View the next folder
  • Alt + Up Arrow: View the parent folder
  • Ctrl + Shift + E: Display all folders above the selected folder
  • Ctrl + Mouse scroll wheel: Change the size and appearance of file and folder icons
  • Alt + D: Select the address bar
  • Ctrl + E: Select the search box
  • Ctrl + F: Select the search box
Taskbar keyboard shortcuts
  • Shift + Click on a taskbar button: Open a program or quickly open another instance of a program
  • Ctrl + Shift + Click on a taskbar button: Open a program as an administrator
  • Shift + Right-click on a taskbar button: Show the window menu for the program
  • Shift + Right-click on a grouped taskbar button: Show the window menu for the group
  • Ctrl + Click on a grouped taskbar button: Cycle through the windows of the group
Magnifier keyboard shortcuts
  • Windows logo key + Plus Sign or Minus Sign: Zoom in or out
  • Ctrl + Alt + Spacebar: Preview the desktop in full-screen mode
  • Ctrl + Alt + F: Switch to full-screen mode
  • Ctrl + Alt + L: Switch to lens mode
  • Ctrl + Alt + D: Switch to docked mode
  • Ctrl + Alt + I: Invert colors
  • Ctrl + Alt + arrow keys: Pan in the direction of the arrow keys
  • Ctrl + Alt + R: Resize the lens
  • Windows logo key + Esc: Exit Magnifier
Remote Desktop Connection keyboard shortcuts
  • Alt + Page Up: Move between programs from left to right.
  • Alt + Page Down: Move between programs from right to left.
  • Alt + Insert: Cycle through programs in the order that they were started in.
  • Alt + Home: Display the Start menu.
  • Ctrl + Alt + Break: Switch between a window and full screen.
  • Ctrl + Alt + End: Display the Windows Security


    dialog box.


  • Alt + Delete: Display the system menu.
  • Ctrl + Alt + Minus Sign (-) on the numeric keypad: Place a copy of the active window, within the client, on the Terminal server clipboard (provides the same functionality as pressing Alt + PrtScn on a local computer).
  • Ctrl + Alt + Plus Sign (+) on the numeric keypad: Place a copy of the entire client window area on the Terminal server clipboard (provides the same functionality as pressing PrtScn on a local computer).
  • Ctrl + Alt + Right Arrow: “Tab” out of the Remote Desktop controls to a control in the host program (for example, a button or a text box). Useful when the Remote Desktop controls are embedded in another (host) program.
  • Ctrl + Alt + Left Arrow: “Tab” out of the Remote Desktop controls to a control in the host program (for example, a button or a text box). Useful when the Remote Desktop controls are embedded in another (host) program.
Paint keyboard shortcuts
  • Ctrl + N: Create a new picture
  • Ctrl + O: Open an existing picture
  • Ctrl + S: Save changes to a picture
  • F12: Save the picture as a new file
  • Ctrl + P: Print a picture
  • Alt + F4: Close a picture and its Paint window
  • Ctrl + Z: Undo a change
  • Ctrl + Y: Redo a change
  • Ctrl + A: Select the entire picture
  • Ctrl + X: Cut a selection
  • Ctrl + C: Copy a selection to the Clipboard
  • Ctrl + V: Paste a selection from the Clipboard
  • Right Arrow: Move the selection or active shape right by one pixel
  • Left Arrow: Move the selection or active shape left by one pixel
  • Down Arrow: Move the selection or active shape down by one pixel
  • Up Arrow: Move the selection or active shape up by one pixel
  • Esc: Cancel a selection
  • Delete: Delete a selection
  • Ctrl + B: Bold selected text
  • Ctrl + +: Increase the width of a brush, line, or shape outline by one pixel
  • Ctrl + -: Decrease the width of a brush, line, or shape outline by one pixel
  • Ctrl + I: Italicize selected text
  • Ctrl + U: Underline selected text
  • Ctrl + E: Open the Properties dialog box
  • Ctrl + W: Open the Resize and Skew dialog box
  • Ctrl + Page Up: Zoom in
  • Ctrl + Page Down: Zoom out
  • F11: View a picture in full-screen mode
  • Ctrl + R: Show or hide the ruler
  • Ctrl + G: Show or hide gridlines
  • F10 or Alt: Display keytips
  • Shift + F10: Show the current shortcut menu
  • F1: Open Paint Help
WordPad keyboard shortcuts
  • Ctrl + N: Create a new document
  • Ctrl + O: Open an existing document
  • Ctrl + S: Save changes to a document
  • F12: Save the document as a new file
  • Ctrl + P: Print a document
  • Alt + F4: Close WordPad
  • Ctrl + Z: Undo a change
  • Ctrl + Y: Redo a change
  • Ctrl + A: Select the entire document
  • Ctrl + X: Cut a selection
  • Ctrl + C: Copy a selection to the Clipboard
  • Ctrl + V: Paste a selection from the Clipboard
  • Ctrl + B: Make selected text bold
  • Ctrl + I: Italicize selected text
  • Ctrl + U: Underline selected text
  • Ctrl + =: Make selected text subscript
  • Ctrl + Shift + =: Make selected text superscript
  • Ctrl + L: Align text left
  • Ctrl + E Align text center
  • Ctrl + R:: Align text right
  • Ctrl + J: Justify text
  • Ctrl + 1: Set single line spacing
  • Ctrl + 2: Set double line spacing
  • Ctrl + 5: Set line spacing to 1.5
  • Ctrl + Shift + >: Increase the font size
  • Ctrl + Shift + <: Decrease the font size
  • Ctrl + Shift + A: Change characters to all capitals
  • Ctrl + Shift + L: Change the bullet style
  • Ctrl + D: Insert a Microsoft Paint drawing
  • Ctrl + F: Find text in a document
  • F3: Find the next instance of the text in the Find dialog box
  • Ctrl + H: Replace text in a document
  • Ctrl + Left Arrow: Move the cursor one word to the left
  • Ctrl + Right Arrow: Move the cursor one word to the right
  • Ctrl + Up Arrow: Move the cursor to the line above
  • Ctrl + Down Arrow: Move the cursor to the line below
  • Ctrl + Home: Move to the beginning of the document
  • Ctrl + End: Move to the end of the document
  • Ctrl + Page Up: Move up one page
  • Ctrl + Page Down: Move down one page
  • Ctrl + Delete: Delete the next word
  • F10: Display keytips
  • Shift + F10: Show the current shortcut menu
  • F1: Open WordPad Help
Calculator keyboard shortcuts
  • Alt + 1: Switch to Standard mode
  • Alt + 2: Switch to Scientific mode
  • Alt + 3: Switch to Programmer mode
  • Alt + 4: Switch to Statistics mode
  • Ctrl + E: Open date calculations
  • Ctrl + H: Turn calculation history on or off
  • Ctrl + U: Open unit conversion
  • Alt + C: Calculate or solve date calculations and worksheets
  • F1: Open Calculator Help
  • Ctrl + Q: Press the M- button
  • Ctrl + P: Press the M+ button
  • Ctrl + M: Press the MS button
  • Ctrl + R: Press the MR button
  • Ctrl + L: Press the MC button
  • %: Press the % button
  • F9: Press the +/– button
  • /: Press the / button
  • *: Press the * button
  • +: Press the + button
  • -: Press the – button
  • R: Press the 1/× button
  • @: Press the square root button
  • 0-9: Press the number buttons (0-9)
  • =: Press the = button
  • .: Press the . (decimal point) button
  • Backspace: Press the backspace button
  • Esc: Press the C button
  • Del: Press the CE button
  • Ctrl + Shift + D: Clear the calculation history
  • F2: Edit the calculation history
  • Up Arrow key: Navigate up in the calculation history
  • Down Arrow key: Navigate down in the calculation history
  • Esc: Cancel editing the calculation history
  • Enter: Recalculate the calculation history after editing
  • F3: Select Degrees in Scientific mode
  • F4: Select Radians in Scientific mode
  • F5: Select Grads in Scientific mode
  • I: Press the Inv button in Scientific mode
  • D: Press the Mod button in Scientific mode
  • Ctrl + S: Press the sinh button in Scientific mode
  • Ctrl + O: Press the cosh button in Scientific mode
  • Ctrl + T: Press the tanh button in Scientific mode
  • (: Press the ( button in Scientific mode
  • ): Press the ) button in Scientific mode
  • N: Press the ln button in Scientific mode
  • ;: Press the Int button in Scientific mode
  • S: Press the sin button in Scientific mode
  • O: Press the cos button in Scientific mode
  • T: Press the tan button in Scientific mode
  • M: Press the dms button in Scientific mode
  • P: Press the pi button in Scientific mode
  • V: Press the F-E button in Scientific mode
  • X: Press the Exp button in Scientific mode
  • Q: Press the x^2 button in Scientific mode
  • Y: Press the x^y button in Scientific mode
  • #: Press the x^3 button in Scientific mode
  • L: Press the log button in Scientific mode
  • !: Press the n! button in Scientific mode
  • Ctrl + Y: Press the y√x button in Scientific mode
  • Ctrl + B: Press the 3√x button in Scientific mode
  • Ctrl + G: Press the 10x button in Scientific mode
  • F5: Select Hex in Programmer mode
  • F6: Select Dec in Programmer mode
  • F7: Select Oct in Programmer mode
  • F8: Select Bin in Programmer mode
  • F12: Select Qword in Programmer mode
  • F2: Select Dword in Programmer mode
  • F3: Select Word in Programmer mode
  • F4: Select Byte in Programmer mode
  • K: Press the RoR button in Programmer mode
  • J: Press the RoL button in Programmer mode
  • <: Press the Lsh button in Programmer mode
  • >: Press the Rsh button in Programmer mode
  • %: Press the Mod button in Programmer mode
  • (: Press the ( button in Programmer mode
  • ): Press the ) button in Programmer mode
  • |: Press the Or button in Programmer mode
  • ^: Press the Xor button in Programmer mode
  • ~: Press the Not button in Programmer mode
  • &: Press the And button in Programmer mode
  • A-F: Press the A-F buttons in Programmer mode
  • Spacebar: Toggles the bit value in Programmer mode
  • A: Press the Average button in Statistics mode
  • Ctrl + A: Press the Average Sq button in Statistics mode
  • S: Press the Sum button in Statistics mode
  • Ctrl + S: Press the Sum Sq button in Statistics mode
  • T: Press the S.D. button in Statistics mode
  • Ctrl + T: Press the Inv S.D. button in Statistics mode
  • D: Press the CAD button in Statistics mode
Windows Journal keyboard shortcuts
  • Ctrl + N: Start a new note
  • Ctrl + O: Open a recently used note
  • Ctrl + S: Save changes to a note
  • Ctrl + Shift + V: Move a note to a specific folder
  • Ctrl + P: Print a note
  • Alt + F4: Close a note and its Journal window
  • Ctrl + Z: Undo a change
  • Ctrl + Y: Redo a change
  • Ctrl + A: Select all items on a page
  • Ctrl + X: Cut a selection
  • Ctrl + C: Copy a selection to the Clipboard
  • Ctrl + V: Paste a selection from the Clipboard
  • Esc: Cancel a selection
  • Delete: Delete a selection
  • Ctrl + F: Start a basic find
  • Ctrl + G: Go to a page
  • F5: Refresh find results
  • F5: Refresh the note list
  • F6: Toggle between a note list and a note
  • Ctrl + Shift + C: Display a shortcut menu for column headings in a note list
  • F11: View a note in full-screen mode
  • F1: Open Journal Help
Windows Help viewer keyboard shortcuts
  • Alt + C: Display the Table of Contents
  • Alt + N: Display the Connection Settings menu
  • F10: Display the Options menu
  • Alt + Left Arrow: Move back to the previously viewed topic
  • Alt + Right Arrow: Move forward to the next (previously viewed) topic
  • Alt + A: Display the customer support page
  • Alt + Home: Display the Help and Support home page
  • Home: Move to the beginning of a topic
  • End: Move to the end of a topic
  • Ctrl + F: Search the current topic
  • Ctrl + P: Print a topic
  • F3: Move the cursor to the search box
Here them all!

Saturday, October 24, 2009

Top 10 AdSense tips You Must Follow

AdSense Tip #1: Find your keywords

    Before placing ads on a web page, check its keyword density. A free and advanced tool for finding the most prominent keywords in a page can be found here: SEO Density Analyzer. Copy the most important keywords to a text file ([web page name]-adsense-keywords.txt).


         AdSense Tip #2: Improve your keywords

     Get keyword suggestions from Overture Search Inventory and from Google AdWords Sandbox. Get new keywords that can help you improve your ad relevance. Enter the keywords from [web page name]-adsense-keywords.txt and save the suggestions to [web page name]-adsense-suggestions.txt.

AdSense Tip #3: Keep your website focused on a theme

     Use the keyword suggestions to enhance your web pages and to build theme-based content. And also try to get your keywords into the anchor text of your incoming links as much as possible. Don’t forget that Google AdSense is keyword-targeted advertising: Google AdSense bases its advert topics on your websites content, this means that content-rich websites of a popular topic should attract a large amount of ads.

AdSense Tip #4: Write a new page every day

      One of the best tips is to add a new page to your web site every day. The more content you have, the more visitors you will get. Put an Adsense unit on each and every content page of your site. But where? You will find more about that from the next AdSense tips.


Top 10 AdSense tips You Must Follow

AdSense Tip #5: Choose the right AdSense format
  >>Read more: Which Adsense ads format is the best?
    Wider formats are successful because the ads are compact, easy to read and are complementary to the content. The top three AdSense formats are:
336×280 large rectangle
300×250 medium rectangle
160×600 wide skyscraper

Another successful format is the 468×15 horizontal ad links, that can be placed under your navigation bar.

AdSense Tip #6: Color tips

    When creating your Google AdSense ads it is recommended to use the color scheme and style of your website so that the ads blend in well. Ads without background color and borders perfom better than ads within borders with background color.

Create a custom AdSense palette:
border color = background color of your web site
background color = background color of your web site
link color = blue, color of your links
url color = black, #999999
text color = black, #333333, color of your main content
You can also rotate your color palette: select multiple color palettes that blend with your site to create variety.

AdSense Tip #7: Position tips
>>> Read more:New Ideas of Adsense Placement - New ways to earn more with Adsense
     Visitors tend to look at the big headlines to see if your page is worth reading. If you get them interested, they will read the text and look for your navigation links.

    Place the AdSense ads in a prominent place around the top/left part of your page or under your headlines, where your visitors are most likely to look at.

    If you have an article page with a long body of text, the bottom of that article is a good place for AdSense ads because your visitors read the text and then they want more resources.

AdSense Tip #8: Increase the number of ads, but not too much

     If you have a lot of text on a page, use multiple AdSense units. You can use up to three AdSense units on a page, two AdSense search boxes and one unit of ad links.

     Link units allow the user to refine what they’re interested in. So if they may not be interested in specific ads on your page, they might be interested in a particular topic, and by clicking on a link unit and a link in the link unit, they’ll be able to specify that they’re interested in that specific topic and get a lot more options and variety on the ads that might appear.

     AdSense for Search allows visitors to search Google.com or your sites (up to 3 domains). You earn money whenever they click on the ads that come up on the search results. If you click the Open search results in a new browser window checkbox in the AdSense for Search settings, you won’t lose your visitors.

AdSense Tip #9: Preview Google ads

     You can find out what ads will be served by Google AdSense if you install Google AdSense Preview Tool, a very simple tool available only for Internet Explorer 6.0. Click to advertiser sites without generating invalid clicks, and easily add their URLs to your URL filter list. Because AdSense uses geo-targeting, Google serves different ads for other countries. Instead of faking your IP or travelling abroad to test your ads, use this AdSense tool to see what ads see your visitors from France, Germany or other countries.

     There may be no Google AdSense ads available for your webpage, so Googlw will display Public Service Ads. You can hide them using alternate colors or images. Make sure you include the image in a simple html file as a link (use target=”_top”). The image size should be the same as the dimension of AdSense units. In the alternate url box, enter the absolute url of the html file.


AdSense Tip #10: What not to do

Don’t click on your own ads
Don’t ask others to click on your Google ads
Don’t manually change AdSense code
Don’t place Google ads on sites that include prohibited content (e.g.: adult sites)
Don’t employ cloaking, hidden text or farm links
Don’t use AdSense ads on the same page with similar ads (e.g.: Yahoo Publisher Network)

Friday, October 23, 2009

5 Perfect Tips To Getting Famous On Social Media

   The major websites that plays a considerable role on building great amount of traffic are Stumble Upon, Digg, Reddit and Twitter. The most common stuff about these websites are they entertain quality over quantity. 5 perfect tips below will help you getting famous and get more traffic from Social Media for your website.


    1/ Maintain your Identity: Using only ONE handle (Nickname) and common logo will produce you recognize easily. The best practice will be if you can practice common username and nickname everywhere this will lead to universal presence. You can check the availability of your desired username everywhere by using usernamecheck website.

   2/ Submit quality contents : If you wish to see a difference, then instead of submitting content from your blog you should also submit quality posts from white-listed websites like mashable, washington posts, Lifehacker and many more. There are two benefit of doing it, first is all community will recognize your submission and  second you will have an insight on what kind of contents humans like to see. If you submit each and every contents from your websiteblog I recommend stop doing so on account of soon your blog will be marked as spam-blog. If we talk about Digg or stumble upon there are many websites and blogs which are banned from them owing to of this.

   3/ Socialize : It’s very substantial aspect of social media you require to understand mankind there. mankind who are social media experts are generally webmaster, SEO. If you connect with them offline as well that will be very helpful for you. I have experienced it and I know the importance of it. You can socialize with them using either IM’s, twitter or E-mail.

    4/ Review them : This is specially in the occasion of stumble upon . If you like someone submission, sending them a term of appreciation will get respect for you. If we talk about websites like digg, reddit, delicious then dropping a expression of appreciation by email or PM will be productive for you later.

   5/ Commenting : Comments at the end for ever and adding appropriate comments which add value to the submission or advertise is always recognized and that besides is worthy for your own identity since persons recognize you for you valuable comment and like minded humans will prize to add you in their friends list.

    Though it’s very essential that when you plan to target social media to promote your articles produce persuaded you have created your identity there and for that you require to be a quality contributor rather then quantity contributor.
    If you have not targeted social media traffic you are missing a significant amount of traffic for your blog. Try to give it a shot on the contrary create persuaded to follow the relevant rules mentioned above.

5 Perfect Ways To Make Money in Internet

    Are you wanting to earn extra money? Do you believe you have some valid money making ideas up your sleeve? You could spend years trying to earn some dough online. However, I'd like to build it as easy as credible for you.


5 Perfect Ways To Make Money in Internet - Making Money

1/ eBay
     Get rid of all that junk stored in your garage and taking up valuable time on the internet and become an eBay seller. eBay has turned some smart marketers into almost overnight millionaires. You can engender small and build your business up.Many offline shop owners have given up their exorbitant rents and replaced their offline shops altogether with online shops on eBay.
ebay
2/ Freelancer:
    Can you write? Are you fine on the PC? Can you create graphics? If there is some sort of avail that you could perform to other human beings online you could produce a comprehensive day income while giving up your normal day job. The most successful internet marketers understand the capacity of outsourcing.
I highly recommend that you visit the Warrior Forum to find elsewhere what other freelancers offer and for what value. . . and then open making a list of in agreement things that you could offer.
 3/ Resell Products With Resale Rights
     Creating your own products from scratch is a pain in the behind, to be honest. That's why products with resale rights and master resale rights are so popular. however I must give you a locution of warning - it is also extremely competitive so unless you can do it a petite differently it won't be as easy as it seems.
4/ Create A Product That Is In Demand
     Whether you are a complete newbie to the internet or not, you would have a sphere of familiarity it what kind of products are in demand in your every day lifetime. Think about ways you could practise a product higher quality. Think about something that you've always had a poser with and hope for a solution for. examine at products that are already successful online and find ways to create something bigger. (Warning: this could be very expensive and date consuming).
5/ Join An Internet Affiliate Program:
     This involves learning how to build money by affiliate marketing. This is where you in fact dont' create a product yourself nevertheless promote an existing product (and you get a commission for each sale made through your affiliate link). There are many ways that you can promote your offers including making money on forums for one. This is really the easiest path to commence earning an income online (especially while still working in your normal day job).


5 Perfect Ways To Make Money in Internet - Affiliate

    Making money on the internet is easier than you think. To avoid wasting date and making very costly mistakes I recommend that you find a mentor online that can assist you as much as likely.

Force Windows 32 bit Support More Than 3.2 GB RAM [Include Windows 7, Vista, 2003, XP etc.)

    As you know, 32 bit (known as x86) Operating System only support 3.2 GB RAM maximum. So, if you have more than 3.2 GB RAM, exp 4 GB, you must install a 64 bit (known as x64) system to use up all resources. But there are quite of software, games and driver can not run normally in 64 bit system, so 32 bit is prefer than 64 bit.
    However, with some tips from vTechTip, you can force 32 bit Windows support more than 3.2 GB RAM instead of installing any 64 bit System.
   1/ With Windows 7: you will need a patcher and this time it’s from a Russian group called Staforce. This patch for Windows 7 RTM and maybe still working at Windows 7 Release Final. After download and run, you just click in the only button and done. This patch was comming with 32bit watermark, you can press Y to apply or N to deny. After all, your computer will be restarted and apply new settings. Download here
Force Windows 32 bit Support More Than 3.2 GB RAM [Include Windows 7, Vista, 2003, XP etc.)

Windows 7 Memory Unlimit Patcher
Force Windows 32 bit Support More Than 3.2 GB RAM [Include Windows 7, Vista, 2003, XP etc.)
Windows 7 Remove 32 bit Watermark
Force Windows 32 bit Support More Than 3.2 GB RAM [Include Windows 7, Vista, 2003, XP etc.)
 Windows 7 After Apply This Patch
    2/ With Windows Vista: Windows Vista has provided with a dUP2 file for the patch according to Geoff Chappell’s article about Vista’s Memory Limit. This patch work well in SP1 and SP2. First you need to put this file to Windows\System32\ and patch ntkrnlpa.exe or put anywhere and browse for that file. Download Here.
Force Windows 32 bit Support More Than 3.2 GB RAM [Include Windows 7, Vista, 2003, XP etc.)


Force Windows 32 bit Support More Than 3.2 GB RAM [Include Windows 7, Vista, 2003, XP etc.)


Force Windows 32 bit Support More Than 3.2 GB RAM [Include Windows 7, Vista, 2003, XP etc.)

    Howerver, you can follow another way from Microsoft, it applies to:
  • Windows Vista Business
  • Windows Vista Enterprise
  • Windows Vista Home Basic
  • Windows Vista Home Premium
  • Windows Vista Starter
  • Windows Vista Ultimate
  • Windows Vista Enterprise 64-bit Edition
  • Windows Vista Home Basic 64-bit Edition
  • Windows Vista Home Premium 64-bit Edition
  • Windows Vista Ultimate 64-bit Edition
  • Windows Vista Business 64-bit Edition

Read here: http://support.microsoft.com/kb/929605/en-us

    3/ For Others Windows Version: Support:

Operating system
Maximum memory support with PAE
Windows 2000 Advanced Server
8 GB of physical RAM
Windows 2000 Datacenter Server
32 GB of physical RAM
Windows XP (all versions)
4 GB of physical RAM*
Windows Server 2003 (and SP1), Standard Edition
4 GB of physical RAM*
Windows Server 2003, Enterprise Edition
32 GB of physical RAM
Windows Server 2003, Datacenter Edition
64 GB of physical RAM
Windows Server 2003 SP1, Enterprise Edition
64 GB of physical RAM
Windows Server 2003 SP1, Datacenter Edition
128 GB of physical RAM


    To do this tip, first, you need to locate boot.ini file from boot partition (C:\boot.ini, this file is hiddened and a system file, you must uncheck to edit it). Open it and add /PAE after /fastdetect line. Exp:
From: multi(0)disk(0)rdisk(0)partition(1)\WINDOWS="Microsoft Windows XP Professional" /noexecute=optin /fastdetect

To: multi(0)disk(0)rdisk(0)partition(1)\WINDOWS="Microsoft Windows XP Professional" /noexecute=optin /fastdetect /PAE.
And then save it, you will dont.

     What's about PAE? This is Physical Address Extension, an Intel-provided memory address extension that enables support of greater than 4 GB of physical memory for most 32-bit (IA-32) Intel Pentium Pro and later platforms. This article provides information to help device driver developers implement Windows drivers that support PAE. For more informations from Microsoft, click here.

Force Windows 32 bit Support More Than 3.2 GB RAM

     File in this article:
     Download here (for Vista and Windows 7) - Note: Use At Your Own Risk! And Before you download the memory limit patchers, please be informed that some antivirus detects it as a hacktool or backdoor.